June 30, 2013

An RPi SMS Gateway


e303

After the implementation of my email account sign up system on my Raspberry Pi hotspot system, I decided to go out and get a Huawei 3G USB dongle and together with my 2nd SIM card (on the multisim plan), I built the SMS gateway right onto the Pi itself. I’ll be the first to admit, I can get a little bogged down doing research before I buy anything, but this time I did it on a whim and ended up with the Huawei E303 – purchased for a reasonable price of S$55 at 4am from everybody’s favorite Mustafa Center. There were other 3g modems there, primarily from Prolink and Vodafone, but they cost twice as much as the Huawei one did.

In anycase, this E303 is a multipurpose USB device, meaning that it has 2 functions – firstly its a 3G modem and secondly, its a storage device (it has an internal storage by itself and an expandable storage via a microSD slot). So depending on how your system scans the device, it may or may not allocate the 3G functionality to it. With the newer devices, it detects the 3G rather effortlessly, but if life wants to throw you lemons, it will detect the device as a USB storage device. Thats where things get a little painful.

You essentially have to change the USB mode from storage device to 3G modem using usb_modeswitch. Simple enough one would think. Not in the slightest. The usb_modeswitch requires you to provide the vendor and product id of the device in the storage mode and the vendor and product id you want it to change to (as the 3G modem). The lsusb command can give you the ids at the storage mode quite easily, but you’ve got to go to Google to find out the ids at the 3G modem mode.

And this isn’t the end of it – the power to the device seems to also play a part. When I connected the Huawei directly to the Pi, no matter what I did with the usb_modeswitch, it refused to change. A bit of reading confirmed what I was beginning to realise, that the modem function actually required more power than the Pi’s USB ports could muster. A typical ‘B’ device (512MB Ram 700MHz) Pi puts out 100mA per port, while the 3G modem needs considerably more. That being the case, without sufficient power, the system would never detect the 3G modem and create the device nodes for it.

Solving the power issue was simple enough – I connected a powered USB 2.0 hub to the Pi and powered the Pi via another power adapter dishing out 1A of current. So I basically had 2 power supplies – one for the Pi and one for the hub. With this setup, the 3G modem was detected easily over the storage and I was a happy camper, even though it took me well over 8 hours to figure things out – trial and error takes time. By the way, if you keep getting switched back to storage mode because you plug the dongle into different ports of the USB hub, just unplug and replug the dongle into that same port of  the USB hub. That should have it switch back to modem mode. After which it should always detect the dongle in modem mode. I’m still looking for a software way to do this, since the usbreset codes I found don’t help, at least for the Pi – they seem to work fine on my standard Ubuntu and Slackware though.

With the device detected properly, it was a matter of installing a 3G controlling software. There are 2 to choose from – gnokii and gammu. By far, gammu is the superior of the two and it doesn’t install a lot of junk that I don’t need the way gnokii does. Its a whopping difference of 156MB for gnokii (on my system) compared to 759KB for gammu (there are a lot of gnome dependencies and stuff that gnokii needs).

The gammu software also comes with a handy curses based configuration tool gammu-config which creates and allows you to setup the most pertinent options in the gammu config file. Install gammu via apt-get:

root@raspberrypi:~# apt-get install gammu
Reading package lists... Done
Building dependency tree
Reading state information... Done
Suggested packages:
  wammu gammu-doc
The following NEW packages will be installed:
  gammu
0 upgraded, 1 newly installed, 0 to remove and 95 not upgraded.
Need to get 0 B/322 kB of archives.
After this operation, 759 kB of additional disk space will be used.
Selecting previously unselected package gammu.
(Reading database ... 39205 files and directories currently installed.)
Unpacking gammu (from .../gammu_1.31.90-1_armhf.deb) ...
Processing triggers for man-db ...
Setting up gammu (1.31.90-1) ...

Get the port your modem is connected to by checking dmesg:

root@raspberrypi:~# dmesg |grep tty
[    0.000000] Kernel command line: dma.dmachans=0x7f35 bcm2708_fb.fbwidth=1680 
bcm2708_fb.fbheight=1050 bcm2708.boardrev=0xf bcm2708.serial=0xb2a882a3 
smsc95xx.macaddr=B8:27:EB:A8:82:A3 sdhci-bcm2708.emmc_clock_freq=100000000 
vc_mem.mem_base=0x1c000000 vc_mem.mem_size=0x20000000  dwc_otg.lpm_enable=0 
console=ttyAMA0,115200 kgdboc=ttyAMA0,115200 console=tty1 root=/dev/mmcblk0p2 
rootfstype=ext4 elevator=deadline rootwait
[    0.000000] console [tty1] enabled
[    0.576921] dev:f1: ttyAMA0 at MMIO 0x20201000 (irq = 83) is a PL011 rev3
[    0.887032] console [ttyAMA0] enabled
[    8.236054] usb 1-1.2.4: GSM modem (1-port) converter now attached to ttyUSB0
[    8.432593] usb 1-1.2.4: GSM modem (1-port) converter now attached to ttyUSB1
[    8.625152] usb 1-1.2.4: GSM modem (1-port) converter now attached to ttyUSB2
[ 4182.867673] option1 ttyUSB0: GSM modem (1-port) converter now disconnected from ttyUSB0
[ 4182.875577] option1 ttyUSB1: GSM modem (1-port) converter now disconnected from ttyUSB1
[ 4182.878408] option1 ttyUSB2: GSM modem (1-port) converter now disconnected from ttyUSB2

In this case you can see there are 3 options ttyUSB0, ttyUSB1 and ttyUSB2.

Run gammu-config and setup the configuration file using any of the ttyUSB* values (you can take the defaults for the rest):

gammu-config

Then run gammu –identify to see if you can pick up the device’s IMEI number (values have been masked out for obvious reasons):

root@raspberrypi:~# gammu --identify
Device               : /dev/ttyUSB2
Manufacturer         : Huawei
Model                : unknown (E303)
Firmware             : 11.126.25.00.00
IMEI                 : xxxxxxxxxxxxxxx
SIM IMSI             : xxxxxxxxxxxxxxx

If you get a message along the lines of “phone not connected”, then fire up gammu-config again and try the other ttyUSB* values shown in the dmesg till gammu identifies your device.

After that its a matter of sending off the SMS as follows:

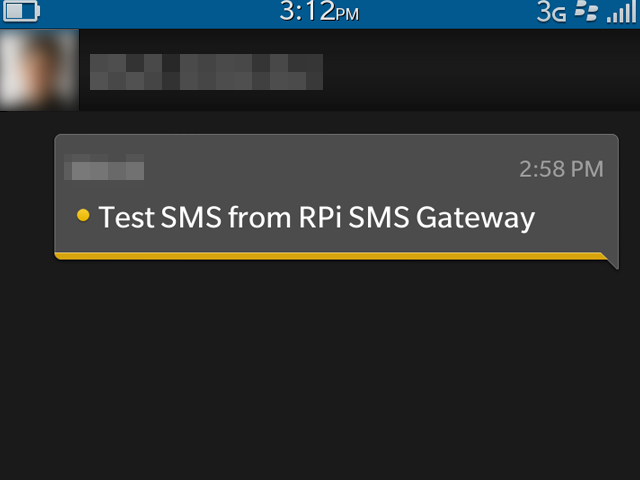
root@raspberrypi:~# echo "Test SMS from RPi SMS Gateway" | gammu --sendsms TEXT +65xxxxxxxx
If you want break, press Ctrl+C...
Sending SMS 1/1....waiting for network answer..OK, message reference=67
root@raspberrypi:~#

Now sit back and wait for the SMS to arrive.

sms

From here it was basically a modification of my hotspot signup scripts to have the user key in their mobile number (local numbers only) and remove the ‘desired password’ section completely.

hotspotsignup

Now when the user signs up, the system will:

  • Send me an email to ask me to authorize adding the user (via a URL link in the mail)
  • If I authorize the user’s request by clicking on the link in the email, the system will automatically add the user’s mobile number (without the country code) as the username to the radcheck table of the radius database and generate a random password which will be encrypted and also added to the radcheck table of the radius database
  • The random password will then be SMS-ed to the users mobile number and the expiry counter gets started
  • Once the expiry counter is over, the system will send the disconnection packet to the wireless router to disconnect the user and then remove the username (mobile number) and password from the radcheck table

If theres any abuse, I’ll have the users mobile number to follow up with. Pretty good way to make use of my many free SMSes, left over every month from my mobile plan because, seriously – who uses SMS anymore?

If you’re trying this out yourself and run into any problems, drop me a line and I’ll see what I can do to help. Setting up a hotspot is a brilliant learning exercise, so despite the frustrations that may occur from time to time, try and have fun – Cheers!

UPDATE:

With regards to using software to ‘unplug and replug’ the modem, I got the usbreset working. My own lack of common sense – I was trying to reset the individual port the modem was on when I should have been resetting the hub.

root@raspberrypi:~# lsusb
Bus 001 Device 001: ID 1d6b:0002 Linux Foundation 2.0 root hub
Bus 001 Device 002: ID 0424:9512 Standard Microsystems Corp.
Bus 001 Device 003: ID 0424:ec00 Standard Microsystems Corp.
Bus 001 Device 004: ID 05e3:0608 Genesys Logic, Inc. USB-2.0 4-Port HUB
Bus 001 Device 005: ID 12d1:1446 Huawei Technologies Co., Ltd. E1552/E1800/E173 (HSPA modem)
root@raspberrypi:~# gammu --identify
Error opening device, it doesn't exist.
root@raspberrypi:~# ./usbreset /dev/usbdev1.4
Resetting USB device /dev/usbdev1.4
Reset successful
root@raspberrypi:~# lsusb
Bus 001 Device 001: ID 1d6b:0002 Linux Foundation 2.0 root hub
Bus 001 Device 002: ID 0424:9512 Standard Microsystems Corp.
Bus 001 Device 003: ID 0424:ec00 Standard Microsystems Corp.
Bus 001 Device 004: ID 05e3:0608 Genesys Logic, Inc. USB-2.0 4-Port HUB
Bus 001 Device 007: ID 12d1:1436 Huawei Technologies Co., Ltd.
root@raspberrypi:~# gammu --identify
Device               : /dev/ttyUSB2
Manufacturer         : Huawei
Model                : unknown (E303)
Firmware             : 11.126.25.00.00
IMEI                 : xxxxxxxxxxxxxxx
SIM IMSI             : xxxxxxxxxxxxxxx

Instead of resetting Bus 001 Device 005 (the modem port), I needed to reset Bus 001 Device 004 (the hub). The reason it worked on my Slackware and Ubuntu setups, was because the modem was connected directly to the laptop’s usb ports and not through a hub. Another lesson learnt!

June 26, 2013

Pi Job – Part 3


And we’re down to the last part of setting up your Raspberry Pi as a radius authentication server and together with a compatible wireless router, building your own private hotspot.

Hotspot login script

What is the hotspot login script?

hotspotlogin

Well what it is, is a script (in shell or perl or php or any other language that suits you) which handles the entire login and authentication process to your radius server and it gives you the login page similar to whats shown above. There are lots of guides to write one of these, but I prefer not to reinvent the wheel, so I just lifted the default hotspotlogin.cgi from Chillispot. Chillispot was the foremost hotspot solution available but its all but defunct now, with the author having completely vanished and development taken over by CoovaChilli. You can get the hotspotlogin.cgi by downloading the source code from the CoovaChilli website and after uncompressing the tar.gz file, the hotspotlogin.cgi is in coova-chilli-x.x.x/doc/ where x.x.x (mind out of the gutter!) is the version.

Place the hotspotlogin.cgi into /var/www/cgi-bin and make sure its executable. You only need to edit two things in the file:

$uamsecret = "theuamsecret";
$userpassword=1;

The uamsecret is yet another phrase to link your wireless router to your hotspot, so remember it as you’ll need it later when you configure your router.

If everything is setup correctly, and you try to use your browser to get to the hotspotlogin.cgi page (eg: http://192.168.1.20/cgi-bin/hotspotlogin.cgi) you should be greeted by a failure message:

loginthruhotspot

It essentially means you can’t just browse directly to the login page, you need to associate through your wireless router to get to it. Why? Well remember, this isn’t a page that should be accessible from anywhere by anyone on any machine unless its for the specific purpose of validating their credentials so that they can connec to the internet from your network.

Configuring the wireless router

Hotspot configuration

Not all wireless routers come with a hotspot function and infact you’re going to be hard pressed to find a SOHO wireless router or AP  that actually does. The last wireless APs that came with a hotspot, as far as I tinkered with, was the 3 Com Office connect series, which, if memory serves, had its own built in hotspot login  (so there was no need for one to configure their own webserver) . These APs however, cost a bomb which I don’t think you want to spend on a simple SOHO setup. The cheap alternative is to get a simple home router, like the Linksys WRT54G series (I use the WRT54GL) and overwrite the stock Linksys firmware with Tomato, DD-WRT or OpenWRT. I’m not going to go into the installation of DD-WRT , etc because there are so many tutorials on how to do it already, especially on the individual sites themselves. If you’ve managed to get this far with my posts, then installing the firmware into the router would be a breeze. What I will cover is how to fill up the essential parts of the hotspot config.

The configuration for the hotspot can be seperated into core, networking and captive portal sections. In a lot of hotspot implementations these days, the core and networking sections will be merged amd some (like DD-WRT) have only a single section encompassing all three.

Core

The core portion takes care of the client machines that connect to your hotspot and basically takes information on the following:

  • DHCP
  • DNS

For the DHCP portion, the system needs to know what network you want your clients to be on. Your home network might be 192.168.1.0/24, so to ensure complete separation from your clients and home network, you can have them be on 192.168.120.0/24 . The DHCP portion may also you how long you want the IP assigned to a client to last for (if not renewed) before it allows some other client to grab it – this is called the DHCP lease. For a hotspot, 600 seconds is more than enough.

On the DNS portion, you’ll need to decide which DNS servers you want your clients to be referred to for resolving addresses (URLs for example). This all depends on what your purpose for the hotspot is. If you want to restrict all your client to only say Google – you can setup your own DNS server (using DNSMasq for example) and configure every resolution to point to Google’s IP. Of course, the clients could very easily set their machines to point to very specific DNS servers, so I find that specifying public DNS servers (like Google’s DNS) is a much better option.

Networking

You might be wondering why the core section’s DHCP and DNS settings are not in the networking portion. Well thats because the networking here is referring to the radius server’s networking options. Key parts here would be:

  • Radius server (IP)
  • Radius secret

The radius server is the IP address of your radius server – in this case, its the IP address of your Raspberry Pi box. Some configurations will ask for a second radius server, but since you have only one, just leave it blank.

The radius secret is nothing more than the secret pass phrase you set up in your Free Radius clients.conf

root@rpi:/etc/freeradius/# cat clients.conf
client 192.168.1.0/24 {
        secret          = thisismysecretphrase
}

In this case, the radius secret is “thisismysecretphrase”. There might also be some port settings, but unless you changed the ports in the radius server setup, you should be able to leave these as the default values.

Captive Portal

The last section relates to the webserver where your hotspotlogin.cgi is and tells the hotspot that for all unauthenticated network requests, send the client to this webpage. Now this only redirects web traffic, so if the client is trying to do SSH, FTP, etc they will just time out cos the packets won’t be allowed out. They have to open a browser and try to go to some URL so they will get redirected to the login page. What you have to fill in here is:

  • UAM server (URL)
  • UAM secret

Before you ask, UAM stands for Universal Access Method and its a common wifi term used to depict the process of using a web based login to gain access to a network.

The UAM server is the full URL to your hotspotlogin.cgi. From the previous posts, we know that in this write up it would be https://192.168.1.20/cgi-bin/hotspotlogin.cgi. Fill in your own IP and location of the hotspotlogin script as appropriate and don’t forget its https and not http.

The UAM secret is what you defined in your hotspotlogin.cgi. In this write up, all the way at the beginning of this post, you can see the UAM secret was set (boringly) to “theuamsecret”.

Now some captive portal settings may also have options for:

  • UAM allowed
  • UAM any DNS

The UAM allowed lets you set specific IPs or addresses that can be fully accessed without a client needing to be authenticated. Like how some hotspots irritatingly let you do a Google search but won’t let you click on any of the found links without authenticating.

The UAM any DNS is usually a checkbox and when checked allows users to specify their own DNS servers. Remember under the DNS portion of the core section I mentioned that clients may specify their own DNS servers to bypass using your defined DNS servers? Well this basically allows or disallows them to do that. Uncheck this, and all clients will need to use your defined DNS or nothing gets resolved. This is actually a dangerous part of hotspots – a hotspot owner can very easily setup a rogue DNS that redirects bank or mail server URLs over to his replica sites and steal information. This is one reason you never do online banking over hotspot wireless. Since we don’t want to do anything nefarious (I hope you don’t), you should always allow clients to use their own DNS servers and always set your DNS servers to trusted  public DNS servers.

Last but not least, make sure you run Chillispot or CoovaChilli with “–coaport <port number> –coanoipcheck” arguments. Some web management portals (like DD-WRT) have these options there for you to edit, others don’t, and if they don’t, then you’ll have to ssh into the router and put it directly into the startup file in the /etc/init.d directory. Not advisable to put it into the config file, since you don’t know exactly how the file gets re-written everytime you make changes from the web management portal. If it just replaces sections of the file that have been changed, thats fine, but if it rewrites everything (which is most likely the case), then you’ll lose those options everytime you make changes from the portal.

So what is this CoA thing? It stands for Change of Authorization and enables RFC 3567 which allows radius clients (like Chillispot or CoovaChilli) to accept disconnect packets through a predefined UDP port and only from the radius server it is configured with, unless its specifically told (via the –coanoipcheck option) to accept the packets from any server, to knock users off the internet. Handy when the expiration time has run out. The disconnect packed does a clean up of the accounting information for the particular disconnected user too. If this not done, essentially even after you’ve deleted the user from the database, they will still be able to connect to your system. Its all in the way radius sort of caches what it does for previous logins – long winded and really boring. If you’re interested, go Google it. There is no real default port for the CoA, but typically UDP port 3799 is used, so make sure you open that port on the radius client. For a typical OpenWRT router, find the /etc/firewall.users or rules file and add:

iptables -t nat -A prerouting_wan -p udp --dport 3799 -j ACCEPT
iptables -A input_wan -p udp --dport 3799 -j ACCEPT

You can add the above either through direct edtiting (OpenWRT/Tomato) or via the web interface (DD-WRT). Might be important to note that the latest versions of OpenWRT don’t have a web interface module to Chillispot or CoovaChilli. That means you either go with the old version (Kamikaze 7.09 – the last version with the web interface) or you manually edit config files to setup all the above information. A good guide (using CoovaChilli) can be found here

At this point, you’ve got everything set up for your hotspot to work, and you can manually create users into the radcheck table of the radius database in your MySQL server to get your authentication going.  You could write a simple script to do this, for example in perl:

#!/usr/bin/perl

# First argument  is the username, second argument is the password

use DBI;
use Crypt::Passwd;

my @chars = ("A".."Z", "a".."z", "0..9", "-", "_","\!","\@");
my $pwsalt;
$pwsalt .= $chars[rand @chars] for 1..24;

# Generate encrypted password with the username as the salt
$pwd = unix_std_crypt($ARGV[1], $pwsalt);

# Connect to MySQL database and add the user
$dbh = DBI->connect('dbi:mysql:radius','radius','myr4d1u5p455');
$sql = "insert into radcheck VALUES (NULL , '$ARGV[0]', 'Crypt-Password', ':=', '$pwd')";
$sth = $dbh->prepare($sql);
$sth->execute || die "Could not execute SQL statement on Password... maybe invalid?";

$dbh->disconnect;

Save that as some filename, say hsadduser, make it executable and run it giving it a username and password:

root@rpi:~# chmod +x hsadduser
root@rpi:~# ./hsadduser johndoe johndoepw

Log into MySQL and check the table:

mysql> select * from radcheck;
+----+----------+---------------------+----+---------------+
| id | username | attribute           | op | value         |
+----+----------+---------------------+----+---------------+
|  1 | johndoe  | Crypt-Password      | := | tepjTqyjw.F6. |
+----+----------+---------------------+----+---------------+
1 rows in set (0.00 sec)

Similarly for deleting entries:

#!/usr/bin/perl

# First argument  is the username

use DBI;
use Crypt::Passwd;

# Connect to MySQL database and delete the user
$dbh = DBI->connect('dbi:mysql:radius','radius','myr4d1u5p455');
$sql = "delete from radcheck where username='$ARGV[0]'";
$sth = $dbh->prepare($sql);
$sth->execute || die "Could not execute SQL statement on Password... maybe invalid?";

$dbh->disconnect;

Of course I have my users created dynamically from a sign up web page, but the scripts above are a basis from which dynamic user creation (and removal) can be done.

You could easily merge the above 2 scripts into a single script using functions and an argument call to determine if its a add user or delete user request like so:

#!/usr/bin/perl

use DBI;
use Crypt::Passwd;

$rdb = "radius";
$rrt = "radius";
$rpw = "myr4d1u5p455";

sub rad_adduser {
my @chars = ("A".."Z", "a".."z", "0..9", "-", "_","\!","\@");
my $string;
$mysalt .= $chars[rand @chars] for 1..24;

# Generate encrypted password with the username as the salt
$pwd = unix_std_crypt($ARGV[1], $mysalt);

# Connect to MySQL database and add the user
$dbh = DBI->connect("dbi:mysql:$rdb", $rrt, $rpw);
$sql = "insert into radcheck VALUES (NULL , '$ARGV[0]', 'Crypt-Password', ':=', '$pwd')";
$sth = $dbh->prepare($sql);
$sth->execute || die "Could not execute SQL statement on Password... maybe invalid?";

$dbh->disconnect;
}

sub rad_deluser {
# Connect to MySQL database and delete the user
$dbh = DBI->connect("dbi:mysql:$rdb", $rrt, $rpw);
$sql = "delete from radcheck where username='$ARGV[0]'";
$sth = $dbh->prepare($sql);
$sth->execute || die "Could not execute SQL statement on Password... maybe invalid?";

$dbh->disconnect;
}

if (($#ARGV == 2) && ("$ARGV[2]" eq "add")) {
        &rad_adduser;
        exit;
} elsif (($#ARGV == 1) && ("$ARGV[1]" eq "del")) {
        &rad_deluser;
        exit;
} else {
        print "Usage: <progname> <username> <password> [add|del]\n";
        exit;
}

If we save the combined script in /usr/local/bin as radtla (which stands for “radius time limited account”), this is used for adding a new radius user by doing:

root@rpi:~# /usr/local/bin/radtla raduser1 raduser12345 add

And to remove the radius user:

root@rpi:~# /usr/local/bin/radtla raduser1 del

Where raduser1 is the radius username you are trying to add/delete and raduser12345 is the password you are allocating to raduser1.

From here its child’s play to write a simple shell script that on authorization (from clicking a link from an email for example), will run the above combined script to add the user with the supplied credentials to the radius database, sleep for whatever time interval you want and then send the disconnect packet and run the above combined script again but this time to delete the user.

#!/bin/sh

# First argument is the userid and second argument is the password

TIMEINT=3600 # One hour time limit to expire the account
RADTLA="/usr/local/bin/radtla"

# Call radtla to add the account
$RADTLA "$1" "$2" "add"

# Sleep for the time limit
sleep $TIMEINT

# Send disconnect packet to knock user off the internet
echo "User-name=$1" | /usr/bin/radclient -x 192.168.1.20 disconnect thisismysecretphrase

# Call radtla to delete the account
$RADTLA "$1" "del"

If the shell script is called dotla.sh and also located in /usr/local/bin and you want to create a radius user johndoe@jmail.com and password jd12345, then call it with a nohup and push it to the background:

/usr/local/bin/dotla.sh 
root@rpi:~# nohup /usr/local/bin/dotla.sh "johndoe@jmail.com" "jd12345" &

The nohup keeps the process going even if you log out and the & pushes the process to the background so the system can still be used while its waiting for the process to complete.

Let me emphasize that there are a whole load of different ways to implement the addition of user accounts and account expiry. You could write the scripts in php, you could use cron (instead of sleep) to run your expiry script against a log that notes down when the account was created, etc – bottom line is, the scripts and method above are just one way of doing things. It may not be the most efficient or elegant way, but the purpose in this post is to detail, in as much scripting as possible, how it can be done and give the reader a the concept of how to write the functions. From this detailed mess (its a mess of code, I’ll concede that), one can clean things up and find a better way. If you want to be a penny pincher about it, you can even link this to PayPal and make folks pay for using your bandwidth – don’t know how legal that is though.

Also I’m not going to go through how to write a portal page to accept the username and password and integrate the different parts of the script into the portal because if you can’t do that yourself, you shouldn’t be even trying any of this.

So there you have it – your own hotspot with an old router and a Raspberry Pi. Hopefully I’ve not completely confused you and driven you insane, but in the off chance that I have, drop me a line and I’ll be more than happy to help clarify your queries and try to cure your insanity.

Or make it worse.

UPDATE:

Folks have been emailing (why can’t they just leave comments) asking if I have a php solution to all this without as many scripts – yes I do. Its a neat php solution for the portals and the expiry employing cron. Drop me a line if you are really too lazy or inept to write your own solution. Actually with all the spoon feeding above, I’d say just plain lazy.

UPDATE 2:

I forgot to mention, that if you’re going to create a hotspot service, you better make sure you have a set of terms and conditions that users agree to by using your service. You don’t want the authorities knocking on your door claiming you did all sorts of nefarious deeds from your internet connection and dragging you through all kinds of legal formalities when the real culprit was actually someone using your hotspot. Sure, the service is for people you know, but how well do you really know them? Lots of sample T&Cs out there for you to modify for your needs – remember, Google is your friend!

June 26, 2013

Pi Job – Part 2


From the last post on turning your Raspberry Pi into a radius authentication server and setting up your own hotspot, I covered installing the webserver, database server and the radius server and then went on to configure the web and database server. Now we’re going to configure the radius server.

Free Radius

The Free Radius configuration gets installed into /etc/freeradius and you should also have a sql/mysql directory in there. If you don’t, then you likely missed installing the freeradius-mysql package.

Inside the sql/mysql directory, you should see a bunch of files including one called schema.sql. You will need to import this file into your MySQL database:

root@rpi~# mysql -u radius -p radius < schema.sql

You will be prompted for MySQL radius user password (which we set earlier as ‘myr4d1u5p455’). Enter it and you should have the necessary tables created. You can then log in to MySQL as the radius user with the password ‘myr4d1u5p455’ and check the imported tables:

mysql> use radius;
Reading table information for completion of table and column names
You can turn off this feature to get a quicker startup with -A

Database changed
mysql> show tables;

+------------------+
| Tables_in_radius |
+------------------+
| radacct          |
| radcheck         |
| radgroupcheck    |
| radgroupreply    |
| radpostauth      |
| radreply         |
| radusergroup     |
+------------------+
7 rows in set (0.01 sec)

As you may recall, we want to dynamically add users using a script from a sign up URL later, so there is no need to add users to the Radius server at this point, however we still need to test the setup, so add just one user for this purpose using a clear text password for simplicity (this will change to encrypted passwords for the actual dynamic user addition):

mysql> insert into radcheck (id, username, attribute, op, value) values ('1', 'user1', 'Cleartext-Password', ':=', 'mypassword');
Query OK, 1 row affected (0.01 sec)

mysql> select * from radcheck;
+----+----------+---------------------+----+---------------+
| id | username | attribute           | op | value         |
+----+----------+---------------------+----+---------------+
|  1 | user1     | Cleartext-Password | := | mypassword    |
+----+----------+---------------------+----+---------------+
1 rows in set (0.00 sec)

Now we’re ready configure the radius server. First thing we need to do is edit /etc/freeradius/clients.conf and add in an entry at the bottom for your local network. The provided clients.conf is full of stuff thats mostly commented out with the “#”, so if you’re comfortable working with that mess go ahead, if not I recommend you rename that file to clients.conf.bak and create a new clients.conf and add in the entry for your local network which is actually all you need. Here we assume you are on a 192.168.1.0/24 network which is a fancy way of saying all the machines on your home network have an IP address of 192.168.1.X where X ranges from 1 to 255:

root@rpi:/etc/freeradius/# cat clients.conf
client 192.168.1.0/24 {
        secret          = thisismysecretphrase
}

So now your clients trying to do authentication have supply the secret phrase and they must have an IP on the 192.168.1.0/24 range.

Next check your /etc/freeradius/radiusd.conf and make sure the modules section has an entry for sql:

root@rpi:/etc/freeradius/# cat radiusd.conf | grep -v "#" | grep -A10 "modules {" |sed '/^$/d'
modules {
        $INCLUDE ${confdir}/modules/
        $INCLUDE eap.conf
        $INCLUDE sql.conf
}

Now we need to edit the /etc/freeradius/sql.conf file to add in the necessary information to access your MySQL radius database. Under the sql section, make sure the following are uncommented and correctly assigned:

database = "mysql"
server = "localhost"
login = "radius"
password = "myr4d1u5p455"

Then edit /etc/freeradius/sites-available/default and add sql to the authorize, accounting, session and post-auth sections.

And that should be it – all you have to do now is test the setup. Fire up the radius daemon in debug mode:

/usr/sbin/freeradius -X

The screen should start scrolling pretty fast and you should see it connecting to the MySQL database and start listening on port 1812 for authentication.

FreeRADIUS Version 2.1.12, for host arm-unknown-linux-gnueabihf, built on Dec 19 2012 at 11:55:13
Copyright (C) 1999-2009 The FreeRADIUS server project and contributors.
There is NO warranty; not even for MERCHANTABILITY or FITNESS FOR A
PARTICULAR PURPOSE.
You may redistribute copies of FreeRADIUS under the terms of the
GNU General Public License v2.
Starting - reading configuration files ...
including configuration file /etc/freeradius/radiusd.conf
.
.
.
rlm_sql (sql): Driver rlm_sql_mysql (module rlm_sql_mysql) loaded and linked
rlm_sql (sql): Attempting to connect to radius@localhost:/radius
rlm_sql (sql): starting 0
rlm_sql (sql): Attempting to connect rlm_sql_mysql #0
rlm_sql_mysql: Starting connect to MySQL server for #0
rlm_sql (sql): Connected new DB handle, #0
.
.
.
 ... adding new socket proxy address * port 40230
Listening on authentication address * port 1812
Listening on accounting address * port 1813
Listening on authentication address 127.0.0.1 port 18120 as server inner-tunnel
Listening on proxy address * port 1814
Ready to process requests.

Fire up another terminal screen and use radtest to test the connection using the test user user1 with password ‘mypassword’ you created earlier and the server secret in the radius.conf of ‘thisismysecretphrase’. If all goes well, you will get an “Access-Accept”.

root@rpi:~# radtest user1 mypassword 192.168.1.20 1812 thisismysecretphrase
Sending Access-Request of id 39 to 192.168.1.20 port 1812
        User-Name = "user1"
        User-Password = "mypassword"
        NAS-IP-Address = 127.0.1.1
        NAS-Port = 1812
        Message-Authenticator = 0x00000000000000000000000000000000
rad_recv: Access-Accept packet from host 192.168.1.20 port 1812, id=39, length=20

Remember to use the correct IP address (the example is 192.168.1.20) for your server. With this done you can now add freeradius to your service startup so that it auto starts everytime the machine boots (check to make sure freeradius exists in /etc/init.d and it is executable).

The next post will deal with the hotspot login and the configuration for the wireless router.

June 26, 2013

Pi Job – Part 1


IMG_00000009

No reference to the ‘American Pie’ movie. Seriously people, get your minds out of the gutter – this is a Tech blog!

A couple of posts back (like 7 or 8 months ago actually) I said I’d let you guys know what I was going to do with my Raspberry Pi which I got for Christmas last year. Lots of ideas were available – turning it into a media server was the foremost suggestion by most folks, but given that I already had my DLNA NAS perfectly setup, that was never an option. Eventually, I decided to use it as a Radius authenticator. And why did I decide that? Well basically because of people streaming in and out of my place and most wanting to use the wifi (a blazing fast fibre connection tends to attract requests like that from my guests). Having gotten tired of keying in the authentication protocols for them, I figured a good use of the Pi would be to have some sort of hotspot authentication going on together with a older Linksys WRT54GL wireless router I had lying around which had been installed with OpenWRT (you can use Tomato or DD-WRT as well with Chillispot or CoovaChilli). I had set this up previously on a Slackware and Ubuntu box so it wasn’t really rocket science but I’ll detail what I did anyway for those looking to do similar.

Now I didn’t want a common name and password that everyone could share around – thats poor security any way you look at it and while I’m not a professional IT security specialist by trade, I still dabble a lot in security (and circumventing it) unofficially (don’t ask, the less you know the less liable you’ll be – call it ‘plausible deniability’ if you want), so it would be embarrassingly idiotic of me to have a common userid/password system in place on anything. While in NTU for work and visits, I noted their SMS system in allowing outsiders to temporarily gain access to their wireless systems and thought it was a good idea. In our little island, every local mobile number must be registered to a real person (as compared to email address which you can create at will), giving me record of exactly who used my system (and essentially someone to blame if there was any abuse). Since I couldn’t find a reliable and viable internet SMS gateway that I could control via CLI, I decided on an email system:

  • the potential user would hook onto my open wireless system
  • the open system would allow them to log in (if they have a userid and password) or go to a  sign up page where they would need to supply a valid email (as their userid) and a choice password.
  • the sign up page would then email me the request and I would click a link embedded in the email to approve/disapprove the sign up
  • after a predefined time period the userid would be removed from the radius server

If you’ve ever administered a mailing list, you’ll see how similar it is to managing users on the list with the exception that the above system has no way to inform the user if their sign up was approved or not (which is why I let them choose their own password). I could send them an email, but there is no guarantee that they have a 3G/LTE connection to receive the email. If I had an internet SMS gateway, I could program things so that the system just takes in the user’s mobile number and on approval for a temporary sign up, will SMS a randomly generated password back to the user’s mobile. Actually I could just build an SMS gateway with the Pi, but I make do with what I have.

Now this is going to be a looooooonnnnnnggggg instructional, as such I’m breaking it up into several posts, so one has to try to keep focused (especially with the long winded way I rant on and on about even the simplest of things).

So here we go – lets get the Pi set up as a Radius server and authenticator. You’re of course going to need the Pi already set up with its base – Raspbian or some server version for the Pi. I suggest the latter since the desktop just slows the whole thing down and you don’t need the desktop at all – you can disable the desktop but theres still a lot of un-needed stuff on Raspbian, so the stripped down server version is the best bet. Make sure your Pi has a fixed IP address and note it down using ifconfig:

root@rpi:~# ifconfig -a
eth0   Link encap:Ethernet  HWaddr c1:02:ca:bd:79:b1
       inet addr:192.168.1.20  Bcast:192.168.1.255  Mask:255.255.255.0
       UP BROADCAST RUNNING MULTICAST  MTU:1500  Metric:1
       RX packets:6398 errors:0 dropped:0 overruns:0 frame:0
       TX packets:1894 errors:0 dropped:0 overruns:0 carrier:0
       collisions:0 txqueuelen:1000
       RX bytes:1162288 (1.1 MiB)  TX bytes:328810 (321.1 KiB)

You can then configure your router to reserve the same IP address for the Pi’s MAC (HWaddr above) – see your router’s manual for more info. If you want to set the static IP from the Pi itself, make sure you know the netmask, gateway and broadcast of your network. Fire up your favorite editor (I use nano) and edit /etc/network/interfaces and change iface eth0 inet dhcp to:

iface eth0 inet static
address 192.168.1.20
netmask 255.255.255.0
gateway 192.168.1.1
network 192.168.1.0
broadcast 192.168.1.255

Those are the network values for my network, so substitute your own. Seriously its a lot easier for the less network inclined to just use the router to reserve a specific IP for the Pi via its MAC address.


The essentials

What are you going to need? Basically a webserver (Apache2), a database server (MySQL), a scripting language to process requests (perl or php – I used perl) and of course the Free Radius authentication server (and its hooks to MySQL)

sudo apt-get install mysql-client mysql-server
sudo apt-get install freeradius freeradius-utils freeradius-mysql
sudo apt-get install apache2 openssl perl

Do note, that apt-get may ask for passwords and stuff while setting up MySQL, so take note of the passwords you supply it with as you’ll need them later.

Configuring the various servers

Apache

Configure the Apache webserver by editing the /etc/apache2/sites-available/default. You can actually safely leave this as what it came as or just add in your proper email address if you want.

Next we need to setup the SSL certs. Reason for this is because the radius auth should happen over an encrypted session.  The hotspotlogin script you’ll be using later will check for an encrypted session and if it doesn’t find one, this (yes, thats my home wireless logo which I designed – don’t go copying it!) is what you’ll get:

useenc

You could make do without an encrypted session and edit the hotspotlogin script to bypass the check, but when you’re dealing with passwords, don’t be an idiot about things, even if its just a home system you’re setting up.

Now when you install openssl, ssl-cert will be installed as well and this gives you a set of self signed certs already (ssl-cert-snakeoil.pem and ssl-cert-snakeoil.key). You can use this if you want or generate your own keys. I’ll go through generating your own just in case:

root@rpi:~# apache2-ssl-certificate

creating selfsigned certificate
replace it with one signed by a certification authority (CA)

enter your ServerName at the Common Name prompt

If you want your certificate to expire after x days call this programm
with -days x
Generating a 1024 bit RSA private key
............++++++
..........................++++++
writing new private key to '/etc/apache2/ssl/apache.pem'
-----
You are about to be asked to enter information that will be incorporated
into your certificate request.
What you are about to enter is what is called a Distinguished Name or a DN.
There are quite a few fields but you can leave some blank
For some fields there will be a default value,
If you enter '.', the field will be left blank.
-----
Country Name (2 letter code) [SG]:
State or Province Name (full name) [Some-State]:Sinagpore
Locality Name (eg, city) []:Singapore
Organization Name (eg, company; recommended) []:MDS
Organizational Unit Name (eg, section) []:
server name (eg. ssl.domain.tld; required!!!) []:rpi
Email Address []: someuser@some.email.address

Then configure the Apache SSL configuration. Most of it will already be in the default-ssl file in /etc/apache2/sites-available and its safe to use whats there, just replace the ssl-cert-snakeoil.pem with the full path of the apache.pem file generated in the step above (if you generate your own cert). Comment out the ssl-cert-snakeoil.key:

SSLCertificateFile    /etc/apache2/ssl/apache.pem

Go to /etc/apache2/sites-enabled and soft link the default-ssl files from /etc/apache2/sites-available to /etc/apache2/sites-enabled with a prefix number (tells the system what order to start up the websites in)

root@rpi:~# cd /etc/apache2/sites-enabled
root@rpi:/etc/apache2/sites-enabled# ln -s ../sites-available/default-ssl 001-default-ssl

Restart apache and you should be able to use any browser to go to https://<your-ip-address> as shown.

https

MySQL Database Server

There isn’t much to do for MySQL. The passwords should have been setup during the apt-get installation already so no worries about that. The initial databases would also have been installed then. Don’t worry about the tables for the users as yet, the schema for that gets set up later with Free Radius.

You will however, need to create an empty database for Free Radius in MySQL called (unsurprisingly), radius:

root@rpi:~# mysql -u root -p -h localhost

You will be prompted for your MySQL root password (which you would have set during the MySQL installation) and after correctly entering it you will be at the mysql prompt where you can then create your database:

mysql> create database radius;
Query OK, 1 row affected (0.00 sec)

Lets now set a user and password to access the radius database – as a matter of security, you don’t want to have the MySQL superadmin root user do this. Create the user and set its permissions – firstly to allow it to connect from localhost with a password and secondly giving it full permissions over the tables in the radius database:

mysql> grant usage on *.* to radius@localhost identified by ‘myr4d1u5p455’;
Query OK, 0 rows affected (0.00 sec)
mysql> grant all privileges on radius.* to radius@localhost;
Query OK, 0 rows affected (0.00 sec)
mysql> exit;

You may now log in to MySQL as user radius from localhost with the password ‘myr4d1u5p455’.

Setting up the Free Radius server is pretty long, so I’m pushing that to a post all by itself.

UPDATE:

Got a 3G USB dongle and setup an SMS gate way on the Pi itself for a much better temporary user sign up system.

June 25, 2013

PSI Graph


psipost1-2

Most people have probably been viewing the NEA PSI website constantly these past few days and for the more statistically inclined, they would probably be wondering why the NEA doesn’t just put up a graph comparison of the various PSI readings instead of their sea of numbers. The answer for most “anti white” camp, is obvious and stems from needing to “confuse the peasants”, but I’ll leave it to you to draw your own conclusions.

In any case, I wrote a quick PHP script (mainly out of boredom) to scrape the readings off the NEA website and employing Google Chart’s API, had the bar chart plotted for their three readings – the 3 hour PSI reading, 24 hour average PSI for PM10 and 24 hour average PSI for PM2.5. The API itself is pretty cool, allowing the user to just input values into an array and call a JS function to plot any type of graph (bar, chart, area, pie, etc).

What do all these readings mean and do we have the right values or standards for determining the air quality? I’m no expert, but this post explains things pretty well.  For  those who want more a modern (better) indication of the air quality and for per hour readings (which NEA is sorely missing and ministers are ignorant about) refer to the AQI and the We/Wear/Masks sites respectively. Its interesting that an NUS PhD student (Jeremy Chen) could come up with a more accurate formula for the PSI readings, but instead of adopting the formula, all NEA can do is argue that their formula is not necessarily worse. Go figure.

All things considered, I would of course advise all not to rely on any readings, but use your eyes and general feel of the environment before venturing out. I stepped outside for less than 3 minutes in what is considered  a “not-so-severe” PSI reading and came back inside with a splitting headache that lasted several hours – not to mention the severe dry throat and tearing eyes.

Stay safe folks!

UPDATE 1:

There have been a few changes since the initial script I wrote, primarily how the different time intervals (hourly, 3 hourly, 24 hourly, etc) have merged to just hourly and the PM 2.5 index has been included into the main reading. As such, now only the average hourly PM2.5 readings from the NEA and AQICN are compared in the graph.

UPDATE 2:

There are several other sites that are quite good for monitoring the PSI situation, in particular, I like this one:

https://www.hazetracker.org/

Its a responsive site (reformats itself on mobile devices),  has a good, easy to understand graphic representation of the situation and some other information on the wind patterns and the Indonesian fires that contribute heavily to the haze. Check it out.

February 26, 2013

USB 3.0 vs eSATA


Theres been a lot of talk about how fast and useful USB 3.0 is and compared to the old USB 2.0 (more so the USB 1.1) standards, its absolutely blazing. The thing is I don’t have a USB 3.0 port on my laptop. Its not old – its an i7 3.0Ghz DC HT and it quite a machine, but it ships with an eSATA port instead of a USB 3.0 and 4 USB 2.0 ports. As you can imagine, eSATA kind of went the way of the mini disc, so its not on a lot of devices. In any case, because of a need to transfer large volumes of data between my esata drive and another external (USB 2.0) drive (about 2.5TBs) and not wanting to wait between 8 to 12 hours (which I had already done serveral times in the past), I went out and got a expresscard 3/4 slot USB 3.0 interface. Didn’t cost much, just S$39 as a combo pack of the expresscard and a USB 3.0 3.5″ HDD enclosure from SLS. No fuss installation, and I started my 2.5TB copy and it took under 3 hours – compared to what it used to take, that was about only a third of the time.

I had read all the reviews and other tests, most significantly this video from NCIX on Youtube. The result was that eSATA was significantly faster (approximately 2x) for small file transfers, while USB 3.0 was just only slightly faster than eSATA for large files so for an overall speed boost, eSATA was the better choice. This tallied with quite a few other review comparisons between the two, but of course the tech in me wanted to get my hands dirty on testing it myself so I started off doing more transfer tests for the USB 3.0 vs eSATA comparison.

While most reviews tested small and big files seperately, I copied a generic large file and in one  instance a mix of large and small files between internal SATA, eSATA, USB 3.0 and GB network drives and the results are in the pics. The drives in the devices were 7200rpm (speed drops by more than 30% with a 5400rpm drive). The emphasis was on the large files because if the other reviews were right, the speeds shouldn’t have varied that much with large files. Lo and behold, transfers from the USB 3.0 to the internal SATA were twice as long as the eSATA to internal SATA.

So, choices, choices. USB 3.0 or eSATA? The logical choice is USB 3.0 (if you’re even remotely considering eSATA, something is seriously wrong with you). Why you ask? Because of its wide spread use in many devices. Throw a stone in a PC shop and you’ll probably hit something that has a USB 3.0 interface (and you’ll probably damage the item to, so don’t seriously throw stones in a PC shop). You probably will be hard pressed to find more than an item or two with an eSATA interface.

But seriously whatever you choose, eSATA or USB 3.0, its far, far better than miserable speeds USB 2.0 has to offer. So if your machine doesn’t have more than one USB 3.0 or eSATA slot or only has one of one but not the other, go buy an expansion card (PCIe, expresscard 3/4 or PCMCIA) for it – it’ll be worth it, trust me.

February 22, 2013

Porteus 2.0 Final Released


Porteus has released its long awaited v2.0 of its live OS. Porteus is a fork of SLAX and when Tomas went into hibernation mode after SLAX 6.1.2, Fanthom (a prominant user on the SLAX forums) forked the distro. It was first called SLAX Remix, and then later with its own website and all, it changed to Porteus.

Unlike SLAX which is basically a one man operation, Porteus is completely community run, with multiple developers working on different aspects of the distro. It helps for better cohesiveness in the production of the releases thats for sure and all the users contribute actively to the betterment of the distro with the developers paying close heed to the needs of the users.

I suppose Tomas’ idea creating SLAX was mainly for his own use and decided to share what he had to others. It that situation, he more often than not disregards what users suggest when the suggestions are not in line with what he wants to do. Can’t fault him for that, its his distro, but it annoys users to no end and tends to pull them towards other distros.

Porteus is light (under 300MB) and has a lot of bells and whistles like the GUI installer and package manager which makes it easy for novices to handle installations to the system. It has multiple desktop environments (DEs) to choose from such as KDE, LXDE and RazorQT with Gnome and Cinnamon coming soon. Bad point (one so far) is that it doesn’t have a Live Kit installer like SLAX has – as in theres no application that will allow one to create a Porteus live distro from a customized porteus setup. Its got to be done manuall, which from what I understand from Fanthom, is exactly how each release of Porteus is made.

So, all the pluses and just one very minor, insignificant minus, which makes it no mystery why I’m seriously considering Porteus as a base now for BioSLAX 8. After the dissapointments in SLAX 7, Porteus seems like a very likely answer. The actual mystery, is what I’m waiting for.

Porteus is close enough to SLAX for me to know the inner workings and customize it so why am I hesitant about making the switch? Seriously I don’t know. Maybe its a sentimental attraction to SLAX or perhaps the fact that my disto does have the term SLAX in it, but whatever the reason, I find myself silently waiting for SLAX7 to get better.

Initially I could say I was waiting because Porteus v2.0 was only released as RCs, but that can’t hold up any more since they just put out the final version. I am particularly interested in having Cinnamon as a DE which Porteus is going to do and I hear Tomas is going to release a newer version of SLAX 7 with KDE 4.10 and the 3.8 kernel. So at least for now, I still have a reason to hold off on jumping to Porteus, but I’m seriously running out of excuses. Heres hoping Tomas gives me a good enough reason with the next version of SLAX.

January 24, 2013

SLAX 7 Thumbdrive Detection – Solved!


Amongst my frustrations with the new SLAX 7 was this annoying effect with older Core2 machines where an attached thumbdrive at boot would be identified as /dev/sda instead of allocating the internal hard disk as /dev/sda.

After a month of complaining and getting no response, mainly because no one else could replicate the problem, I spent a long while Googling and found this site:

https://lkml.org/lkml/2012/10/25/595

It basically explains that the issue was due to a kernel configuration for floppy devices. You read right – floppy devices. In order to save the bootup time and detection for floppy devices that weren’t there, some changes were made to the kernel and if you set:

CONFIG_BLK_DEV_FD=Y

then all drives would be named according to the order they are detected and that usually means USB first. This happens only on the older Core2 machines as I stated and its highly annoying for a distro that uses LILO as its boot manager since the boot devices etc have to be defined in the /etc/lilo.conf. Folks were saying “use UUIDs” with LILO but there was very limited success in doing so and this posed a huge problem in wanting to install SLAX as a fully installed Linux.

SLAX 7 Thumbdrive Detection - Solved!

To restore the correct naming for the drives, the kernel needs to be compiled with:

CONFIG_BLK_DEV_FD=m

SLAX 7 Thumbdrive Detection - Solved!

How did we find this out? Well trying to find a solution to the issue, I tried out Porteus (another live distro forked from SLAX) and found that it had no issues with the naming of the drives. Together with the link I found above, I made mention to Tomas, who then compared the .config files from both SLAX and Porteus and found that on Porteus, the config option was set to “m”.

I recompiled the kernel with the option set to “m” and just like that, the naming went back to what we’re all used to with the internal hard drives getting named first.

Another issue solved!

December 29, 2012

Christmas (Raspberry) Pi


And guess what I got for Christmas?

Courtesy of Aziz. I’d been contemplating getting a Raspberry Pi to play with for a few months now. I had heard that Aziz had one and so I asked him about it. That’s when he suggested that I wait till Christmas and he give it to me for a present rather than rack his brains on what to get me for my annual Christmas party. Given that the new version with higher RAM would be out then I agreed and the rest as they say is history.

Now if you read about the RPi online, you’ll see its not “as easy as Pi” to deal with. Ok, I’ll can the “pi” puns – they are making even me uncomfortable. Anyway, a lot of users find the RPi frustrating, but read a little deeper and you’ll realise these people were complaining cos they were using it wrongly. The RPi was designed as a not-for-profit system for kids to learn how to code. It has a 700MHz ARM processor and 512MB of RAM. If you try to run an X desktop on this thing, you deserve the pain you get. Then again you can’t blame these people because they get their images of the web from from people who should know better and they just use them. There are a whole lot of distro images available for the RPi and I downloaded a few of them to try everything out – Puppy for ARM, Raspbian Wheezy (an RPi port of Debian’s Wheezy), Sugar and XBMC, just to name a few. Even Sugar, a desktop designed to get kids started with RPi was crawling and I expect most kids to have much, much less patience that I do (that is actualy arguable). As I said, X is a no no on this thing.

As a server or a headless node, running things in the background, its pretty good. Boots quickly, its responsive and can be mounted behind a monitor and out of sight. Its powered by a micro USB, so if your monitor has one of those USB ports on it, you don’t even need a seperate power source. The board comes standalone but it has 2 USB2.0 ports on it, a fast ethernet port (100MBps), RCA video out, HDMI out and an anlogue audio out. As mentioned its got a 700MHz ARM processor, but using its own configuration tool (raspi-config) you can overclock it quite a bit, but this dramaticall shortens the life span of the RPi I’m told. Cases are obtainable seperately and by the time its all put together its hardly bigger than your average sized palm.

I didn’t want to plug it to my main setup, so I setup my older monitor, a good old 23 inch Samsung Syncmaster, dug out my Dell wireless keyboard and mouse started plugging stuff in, until I realised that this particular monitor didn’t have a HDMI in, only DVI and VGA in. Not wanting to have wasted the effort I went through to get the monitor out of storage and powering it up, I went out and bought a DVI to HDMI converter. That worked fine in getting the picture up and in the righ resoution and a quick config later, I had sound coming out from the analogue audio output into my Christmas present from 2011, which was a small sound bar – fits right under and behind the monitor. Added a USB wireless device and and I had a “portable” computer – sort of. Lift the monitor and everything goes with it, sans keyboard and mouse.

There are a lot of projects for the RPi out there and you can check out some of the distros available from here. The most common use of the RPi seems to be as a media server. Folks just download XBMC for Raspberry and connect up their media directly through the USB ports to be served to their other devices. And while you don’t have to necessary interact directly with the GUI for XBMC after its setup, I still think its way too slow to be worth it. Aside from which I already have a DLNA NAS.

What would really be cool would be Android ICS on the RPi. Its seems to have already gone into developement, but somehow isn’t being released. More than half a year has passed since the original announcement, so I’m not holding my breath.

That leaves me still weighing my options as to whats the best use I can put my RPi to. Will think it over then get back on what I decide.

December 23, 2012

Thoughts on SLAX 7


When SLAX 7 was released on Dec 10th, the initial feel was that it was pretty good and ready as a base for the new release of my own BioSLAX distro, but after playing with it for a week and interacting with Tomas and other users, I think its not ready at all.

  • No PXE boot
  • SCSI controllers are weird (if you boot up with a usb drive/thumbdrive, it will allocate sda to the usb drive instead of your internal drive)
  • Doesn’t auto mount partitions or drives
  • Missing a tonne of software and libraries
  • KDE 4 is still lacking in user friendliness

Don’t know if it was released in an unpolished state because of pressure from Tomas’ commercial investors or some other reason, but its just not built like Slax 6 was.

Other nuisances include the Kernel Mode Settings (KMS) which while is great for setting the native resolution of screens, wrecks havoc on bootsplash. As you know from an earlier post, I was able to get bootsplash working with the new initramfs, but even then, KMS completely kills it when the system hands over control of the graphics setting to the kernel – no /proc/splash means no bootsplash and no decor for the VTs either. Advice so far as been to use things like fbsplash or plymouth. The complexity of both isn’t really justified and I’m still looking for a way to use bootsplash with the whole thing.

UPDATE:

Tomas has implemented the PXE boot after a few of us requested it. Also the SCSI controller problem seems to be isolated only to older Core2 machines. The i3s, i5s and i7s don’t seem to have this issue and it also doesn’t exist with Slackware 13.37. Might be a stray kernel option in the compilation, but I need to look into this more.

UPDATE 2:

Solved the SCSI controller problem and it turns out to be floppy device issue!