May 15, 2014

Consolidation With The Intel NUC


NUC-01

As readers of this less-than-often-updated blog are aware, I used my Raspberry Pi in conjunction with an old Linkysys WRT54GL wireless router into a wireless hotspot, complete with its own SMS gateway with the help of a 3G dongle. It worked flawlessly and I did receive emails and comments about how good the guide was (given the amount of detail and inate rambling, it better have been!). On top of that little bit of hardware, I also had an old Windows 7 laptop which was consolidating all the video cams in my home into a single web interface by means of a software called WebcamXP, which is a webcam monitoring tool. Its pretty neat in the way it allows users to specify URLs to their cameras for still shots and then strings them together to form a motion JPG or MJPG for a stream. The reason I used Windows 7 was because the software is purely Windows based. Linux has “mjpg-streamer“, which has two modes, a full video stream and also allows for still images to be taken at any point of time. Reloading the stills very rapidly would form an MJPG stream (like flipping pages of drawings to form a crude animation), pretty much the same thing WebcamXP does but I was too preoccupied with other stuff to actually write the script to reload the stills and also customize the webpages to give the same user interface. Why did I need the same interface? Well because the wife uses the system to view the cams as well and lets just say the less changes I have to instruct her to go through, the better it is for everyone. On top of this, I also had a simple file server running on the Windows laptop where I’d store cartoons and kid’s movies and stuff in lower quality MP4 format (separate from my very high quality mkvs in my DLNA NAS) for my son to stream to his iPad using the older AirVideo Server (AVS) software or played directly to the 55″ LG HDTV (yeah super cool, super big monitor) to which it was hooked up. The AirVideo Server, for all intent and purpose was also a Windows only software.

So the Pi was in my study, the laptop was in the TV console and I had two external USB drives hooked up to the laptop which served to store the cartoons and kid’s movies. Not a very pretty setup let me tell you (but tolerable since everything is hidden behide cabinet doors). Basically I had two very under powered devices, which served their purpose but the need to declutter eventually arose, so I had to look into consolidating the hotspot, webcam monitoring and the file server into a single device. Of course the unified machine would run Linux and be sufficiently powerful enough for the three tasks but also sufficiently powered for me to experiment and do projects on – something I couldn’t really do with the Pi. Don’t get me wrong, the Pi is a great little tool, but for heavy coding and projects, you just need something more powerful. I also needed something relatively small, that could fit inside the TV console, hidden from sight, with a sufficiently good BlueTooth range so I could use a wireless keyboard/trackpad to control it while lounging on the sofa 12 feet away.

After considering all the options, I decided to get an Intel NUC (Next Unit of Computing). I was gunning for the i3 version but the need to be some what future proofed steered me towards the i5 version. Now there are two i5 NUCs, one with a built in SATA connector and drive tray (D54250WYKH) for hooking up an internal 2.5″ disk drive (main disk is an mSATA SSD) and one without D54250WYK. The cost difference was actually quite significant, in the range of about S$200. On top of that I’d still need to get memory and a wireless combo card as the system comes bare. So with wanting to keep costs down, I decided to get the one without the internal SATA – after all I could still hook the USB drives to the many USB 3.0 ports the NUC had. I headed off to Sim Lim Square to see what kind of offers were up for grabs and heres where things get a little fortunate for me. On browsing the shops to compare prices, I came across one shop which had the D54250WYKH for the price of D54250WYK and they were also throwing in a Wireless N/BT combo card for free. I enquired twice on the price wanting to make sure the offer was right, and it was! I didn’t hesitate and got the system immediately with 4GB of memory (thing to note with the NUCs, you need _low_ powered memory – the system won’t even boot if you use regular memory). I later found out that the shop had misprinted the price of the item, but hey – all good for me!

NUC-02

So with the machine settled, I had to decide on the flavor of Linux to run and since I’d be coding and experimenting, I wanted an OS with a good package management system as I didn’t want to waste time on building dependencies for stuff that I needed. That meant almost immediately, that Slackware was out. Slackware is what I call the grand-daddy of the Linux flavors as using it teaches you about the inner workings of the Unix system. If you’ve grown up on Slackware, there isn’t a Unix system out there you can’t handle. Unfortunately, this familiarity comes from having to compile and build almost every single thing from scratch. It doesn’t have a good package management system because even if you do build Slackware packages, each of the dependencies is a separate secondary package which is not checked for when the primary package is being installed, unlike Debian’s apt-get or Red Hat’s yum. Slackware is a great teaching tool and its good hacker’s console, but its time consuming. Ubuntu is by far the most popular and easily installed (and maintained) of the Linux flavors and they had just released their very next LTS (Long Term Support) version, 14.04, so thats what I went with.

Moving the hotspot stuff with the SMS gateway was trivial, given it was essentially installing all the same packages I used on the Pi’s Debian image on Ubuntu – with a few changes to the PHP scripts and the Apache config (due to changes in PHP and Apache itself with the newer versions). All in all nothing really new from the instructions in my earlier posts, so I’m not going through any of that.

Setting up the fileserver was also trivial, as all it required was installing SAMBA and configuring it to read the 1TB SATA drive I put into the NUC (OS was on the mSATA SSD). Optimizing SAMBA for good read/write however was a different story. Using SAMBA with its default settings over my 500Mbps homeplug (which the NUC was connected to) I was getting like 2MB/s transfers (roughly 16Mbps). As you know, homeplugs never give you the speed at which they advertise, its a theoretical speed. You’ll be lucky to get half of what they advertise, more often than not its (at best) around a third due to interference and other factors. Adding in the overheads of the network protocol, disk write speeds and all,  SAMBA should have been giving me maybe between 12 – 15MB/s. As such, 2MB/s was completely unacceptable. Thanks to the fact that we’ve been optimizing SAMBA at work for some of our backblaze like storage arrays, I had a rough idea what to tweak in the config. For those who don’t do the kind of work I do, you could also Google for optimizations (this is a good read). I made the following changes to the smb.conf:

read raw = Yes
write raw = Yes
strict locking = No
socket options = TCP_NODELAY IPTOS_LOWDELAY SO_RCVBUF=131072 SO_SNDBUF=131072
min receivefile size = 16384
use sendfile = true
aio read size = 16384
aio write size = 16384

Immediately I got a 5x boost in SAMBA read/write speeds to about 10MB/s – that’s about 80Mbps, which was at least tolerable if nothing else. That done, I needed to get AirVideo Server (AVS) running on the Linux. Fortunately the makers of AVS had created an java version that ran on Linux and I had actually packaged the whole thing (including all its dependencies, libraries, ffmpeg, etc) as a Slackware package for running on the Linux Live version of Slax. Turns out packaging everything was a good idea, since AVS jar file wasn’t compatible with the newer libraries and installing the old libraries would have definitely broken other parts of Ubuntu. So with the Slackware package I created I isolated all the old dependencies and libraries and the older version of java that would run the AVS jar into a separate directory and configured AVS to start only with those files. Pointed the config to the 1TB SATA drive where I transferred all the cartoons and kid’s movies and fired up the iPad to test and everything was running smooth.

So now, I only had the webcam monitoring system to deal with. Doing actual video streaming is extremely bandwidth intensive and viewing such streams over mobile data can deplete your data plan very quickly. Loading JPG stills rapidly one after the other (such that they appear like a continuous video feed, i.e MJPG streams) takes up significantly less bandwidth. So learning from the way WebcamXP did things, I would have to start the actual video streams locally (internal LAN) while setting up the MJPG stream such that it could be accessed externally (internet).

The “mjpg streamer” software I mentioned above would take care of creating the video streams and the stills without me having to write any code of my own. So I would run mjpg streamer for each camera on a different TCP port (eg: 81, 82, 83 …) using the following:

/usr/bin/mjpg_streamer -b -i "input_uvc.so -d /dev/video0 -f 30 -r 320x240" -o "output_http.so -w /var/www/htdocs -p 81"

Where /var/www/htdocs is any web accessible folder path where the stills are generated. With this, I could access “http://localhost:81/?action=snapshot” and view the still of the video stream at any point in time.

All that was required at this juncture, was to have a proxy like system where some script would take care of reloading the stills and to have a html page (an exact copy of the page WebcamXP uses so I don’t have to change the user interface) pointing to that proxy for the links to each of my cameras. Fortunately for me, real brilliant minds (unlike mine) always come up with these ideas before I do and there was a ready PHP camera proxy solution available. The core of the script is this:

$rand = rand(1000,9999);
$url = '<html link to mjpg streamer still>'.$rand;

$curl_handle=curl_init();
curl_setopt($curl_handle,CURLOPT_RETURNTRANSFER,1);
curl_setopt($curl_handle,CURLOPT_URL,$url);
curl_setopt($curl_handle, CURLOPT_USERPWD, "EXAMPLEUSER:EXAMPLEPASSWORD");
$buffer = curl_exec($curl_handle);
curl_close($curl_handle);

if (empty($buffer))
{
print "";
}
elseif($buffer == "Can not get image.")
{
print "Can not get image.";
}
else
{
header("Content-Type: image/jpeg");
print $buffer;
}

The “html link to mjpg streamer still” is simply:

http://localhost:81/?action=snapshot

That chunk of code repeats for each camera you have, with only the port number (ie:81) changing corresponding to the port numbers you used for each camera. The code just creates a random number appended to the end of the mjpg streamer snapshot link which forces the image reload and overwrite the old still image with a new one (via curl) to create the MJPG stream. From the code, you can see that one can also individually set passwords for access to the camera. The only downside of this script is that the usernames and password are in plain text, but thats still ok to a certain extent. Now assuming you have named the proxy script “camproxy.php”, to access the MJPG stream of each camera, you would call the following URL from your html page and it would show you the MJPG stream of your cam:

http://localhost/camproxy.php?camera=x (where x is the number of your camera  1, 2, 3…)

Cool stuff and the wife didn’t even know I changed anything!

And there you have it – all neat, all tidy and all consolidated, just the way I like things.

UPDATE 1:
AirVideo Server has a spanking new HD version which has an official Linux version – way to go InMethod!

UPDATE 2:
With my newer Sineoji 600Mbps AV2 homeplugs I didn’t see a significant increase in my SAMBA speeds, was more or less hovering around 80 – 90Mbps, but with my latest 1800Mbps AV2 gigabit homeplugs, I’m getting a cool 160 – 180Mbps with SAMBA.

March 28, 2014

WD-EX4


WDEX4-01

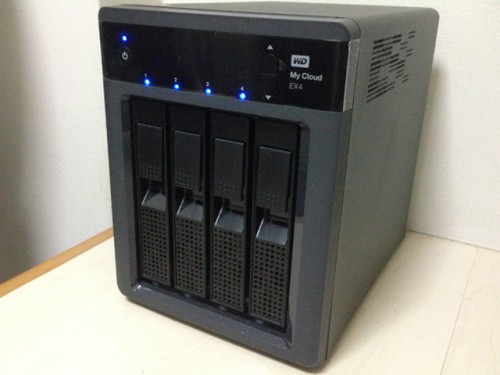
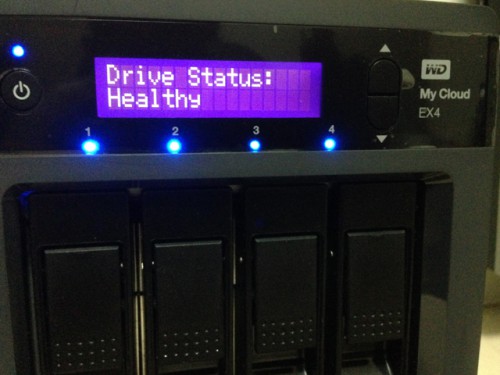
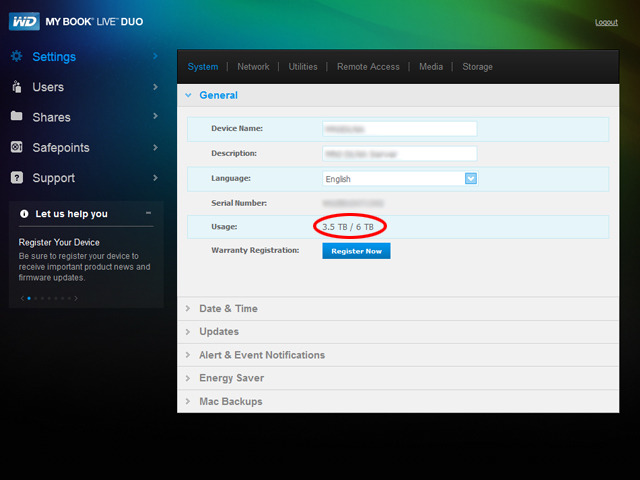
As readers would know from my first few posts, I’ve already got a WD My Book Live Duo DLNA NAS which houses all my HD media and streams it to my home entertainment system. It would appear that my zest for good HD quality movies with excellent sound had almost fully depleted the 6TB (RAID 0) of space on that device. I was looking at about less than 2TB remaining. I would either have to copy the more than 4TB of data out, get larger drives and go through the pain of expanding the size like I did before then copy the data back in, or get a new device. The other consideration was that I had no good recovery plan should the NAS drives fail for any reason. With all that in mind, I decided on getting WD’s EX4 My Cloud DLNA device. A hot-plug 4 bay device with a simple LCD scrollable display and fully redundant power and network (but strangely no redundant cooling fan), it supports RAID 1, 5, 10 and JBOD modes and has two USB 3.0 ports for attaching external storage to it.

WDEX4-01a

The hard drives just slot into the enclosure courtesy of a spring loaded swivel handle, which one has to be very careful with – if you accidentally hit any of the handles, it could pop the disk out while in operation, which would lead to a rebuild that believe me takes longer than you’d have time for (even for a low capacity setup).

WDEX4-02

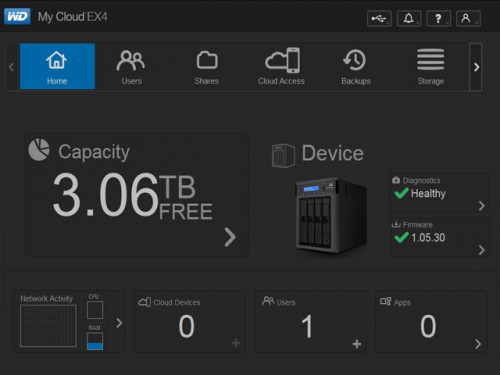
The web interface is pretty intuitive and user friendly, allowing one to configure and operate the device easily. The interesting thing about this device is that it allows for 3rd party application modules to be setup. You can have Joomla!, BitTorrent, Icecast and many other apps running on the device utilizing the storage with a few clicks. It also allows full integration with other cloud vendors like Dropbox and Google Drive and also does the basic backups like TimeMachine for Macs or just simple external storage backups (via the USB 3.0 ports).

WDEX4-03

The other thing I like about it, is the various configurations you assign to your two network interfaces – round robin, active backup (default) or even 802.3ad link aggregation. This means if you have the right switch/router in place (eg the Asus RT66U with custom Merlin firmware, Netgear GS108T Smart Switch), you can actually combine your network ports to double your throughput.

All that doesn’t come cheap however, you’ll be out about S$600 just for the device alone without any drives, but then again, compared to the more prominent brands like QNAP and Synology, this price is pretty good for a system that can do so much.

February 26, 2013

USB 3.0 vs eSATA


Theres been a lot of talk about how fast and useful USB 3.0 is and compared to the old USB 2.0 (more so the USB 1.1) standards, its absolutely blazing. The thing is I don’t have a USB 3.0 port on my laptop. Its not old – its an i7 3.0Ghz DC HT and it quite a machine, but it ships with an eSATA port instead of a USB 3.0 and 4 USB 2.0 ports. As you can imagine, eSATA kind of went the way of the mini disc, so its not on a lot of devices. In any case, because of a need to transfer large volumes of data between my esata drive and another external (USB 2.0) drive (about 2.5TBs) and not wanting to wait between 8 to 12 hours (which I had already done serveral times in the past), I went out and got a expresscard 3/4 slot USB 3.0 interface. Didn’t cost much, just S$39 as a combo pack of the expresscard and a USB 3.0 3.5″ HDD enclosure from SLS. No fuss installation, and I started my 2.5TB copy and it took under 3 hours – compared to what it used to take, that was about only a third of the time.

I had read all the reviews and other tests, most significantly this video from NCIX on Youtube. The result was that eSATA was significantly faster (approximately 2x) for small file transfers, while USB 3.0 was just only slightly faster than eSATA for large files so for an overall speed boost, eSATA was the better choice. This tallied with quite a few other review comparisons between the two, but of course the tech in me wanted to get my hands dirty on testing it myself so I started off doing more transfer tests for the USB 3.0 vs eSATA comparison.

While most reviews tested small and big files seperately, I copied a generic large file and in one  instance a mix of large and small files between internal SATA, eSATA, USB 3.0 and GB network drives and the results are in the pics. The drives in the devices were 7200rpm (speed drops by more than 30% with a 5400rpm drive). The emphasis was on the large files because if the other reviews were right, the speeds shouldn’t have varied that much with large files. Lo and behold, transfers from the USB 3.0 to the internal SATA were twice as long as the eSATA to internal SATA.

So, choices, choices. USB 3.0 or eSATA? The logical choice is USB 3.0 (if you’re even remotely considering eSATA, something is seriously wrong with you). Why you ask? Because of its wide spread use in many devices. Throw a stone in a PC shop and you’ll probably hit something that has a USB 3.0 interface (and you’ll probably damage the item to, so don’t seriously throw stones in a PC shop). You probably will be hard pressed to find more than an item or two with an eSATA interface.

But seriously whatever you choose, eSATA or USB 3.0, its far, far better than miserable speeds USB 2.0 has to offer. So if your machine doesn’t have more than one USB 3.0 or eSATA slot or only has one of one but not the other, go buy an expansion card (PCIe, expresscard 3/4 or PCMCIA) for it – it’ll be worth it, trust me.

August 12, 2012

Detailed NAS-tiness


The problem

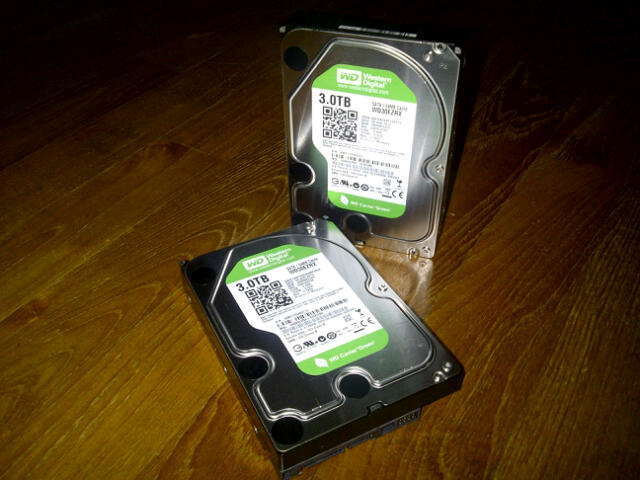
Looking for a way to upgrade the capacity of the My Book Live Duo (MBLD) 4TB to 6TB, I tried to swap the 2 x 2TB disks for 2 x 3TB hdds. The MBLD uses mdadm as its raid tool, and its use is pretty well documented on the web. As with most raid systems, the recommended way was to replace the disks one by one, letting the system reinitialize the disks and the later grow the raid array. Unfortunately, when I did this with the 3TB disks, the maximum size of the array was still stuck at either 2TB (raid1 mode) or 4TB (raid0 mode). The grow option with mdadm said the maximum size was already reached. Using the raid mode conversion or the factory reset on the web UI still only maxed out at 2TB with the 3TB disks.

That began 48 hours of trial and error (mainly because of the reinitializing/rebuilding of the array – took about 6 hours each time) and now at the end of the 48 hours, I have 3TB (raid1)/6TB (raid0) on my MBLD 4TB system.

Below are the steps I took. I’m pretty sure some of them can be left out, and probably someone knows a 3 step way of doing this, but this is how I got it done and for those who don’t know a way, I hope it works for you too.

Disclaimer

I accept no responsibility or liability if anything in the steps I’ve outlined, communicated or alluded to in any way, through any comments, views or statements of any form, bricks, incapacitates, renders unuseable or damages your device (whatever device it may be). By reading these instructions and carrying them out in whole or in part, you accept full responsibility for the outcome, whatever outcome that might be and absolve me, the website owner, the owner of the machine and all parties directly or indirectly related to this website and me from any liability whatsoever.

In other words, if you break what you’re working on, its ALL on YOU!


Pre-requisites

The guide below assumes very heavily that you have UNIX experience and you know at least what ssh is and how to do it using one of the many clients available or through another UNIX/MAC machine’s cli (if you don’t know what cli means, then I’d advise against continuing).

Enabling SSH

  • Boot the MBLD and access it from the web UI.
  • Add the “/ssh” to the end of the URL (ie: http://<MBLD_IP>/UI/ssh) to access the SSH settings
  • Enable ssh

Initializing the new drives

  • Shut down the MBLD and remove ONE drive and replace it with the higher capacity drive
  • Boot up the MBLD – the led will be yellow but you can still access it over SSH and the web UI
  • The web UI will have a red ‘i’ icon with the message that a drive is being reinitialized – let it continue
  • When it has finished initializing the disk, reboot the MBLD and repeat the last 3 steps for the 2nd hard drive (whole thing can take a few hours)
  • After the 2nd higher capacity disk has been reinitialized, reboot the device to make sure it comes up correctly.
  • The web UI should still say you only have 4TB (raid0/spanning mode) or 2T (raid1) even though you are now using the higher capacity drives.

Removing the raid partitions

  • Use PuTTy (or any other ssh client) to ssh to the MBLD as root, using the password ‘welc0me’
  • Check for the raid mount using ‘df -h’ it should be /dev/md3 mounted to /DataVolume (one with the largest storage)
  • Unmount /dev/md3 with ‘umount /dev/md3’
  • Check which partitions make up the raid using ‘mdadm -D /dev/md3’ – you should see 2 partitions, /dev/sda4 and /dev/sdb4
    # mdadm -D /dev/md3
    /dev/md3:        
            Version : 1.2  
      Creation Time : Sat Sep 15 10:40:58 2012     
         Raid Level : linear     
         Array Size : 3897997296 (3717.42 GiB 3991.55 GB)   
       Raid Devices : 2  Total Devices : 2    
        Persistence : Superblock is persistent    
    
        Update Time : Sat Sep 15 21:44:03 2012          
              State : clean 
     Active Devices : 2
    Working Devices : 2 
     Failed Devices : 0  
      Spare Devices : 0           
    
               Name : MyBookLiveDuo:3  (local to host MyBookLiveDuo)
               UUID : 7d229761:df1a7961:f3f1f7dd:388be367
             Events : 173
    
        Number   Major   Minor   RaidDevice State
           0       8        4        0      active sync   /dev/sda4
           1       8       20        1      active sync   /dev/sdb4
  • Use ‘parted’ and select /dev/sda then print the partition info using ‘p’
  • You will see that the last partition is /dev/sda4
    # parted /dev/sda
    GNU Parted 2.2
    Using /dev/sdaWelcome to GNU Parted! Type 'help' to view a list 
    of commands.
    (parted) p
    Model: ATA WDC WD30EZRX-00D (scsi)
    Disk /dev/sda: 3001GB
    Sector size (logical/physical): 512B/512B
    Partition Table: gpt
    
    Number Start  End    Size   File system    Name    Flags 
     3     15.7MB 528MB  513MB  linux-swap(v1) primary raid 
     1     528MB  2576MB 2048MB ext3           primary raid 
     2     2576MB 4624MB 2048MB ext3           primary raid 
     4     4624MB 2000GB 1996GB                primary raid 
    (parted)
  • As can be seen, even though you are using a higher capacity drive, the partition is still only 2TB in size
  • Use ‘rm 4’ to remove /dev/sda4
  • Repeat the last 4 steps, running ‘parted’ on /dev/sdb (instead of /dev/sda)
  • Now you would have removed both /dev/sda4 and /dev/sdb4 from disks

Creating correctly sized raid partitions based on 3T hdds

  • Reboot the MBLD – the led will stay yellow (may turn red), but you can still access it
  • Use PuTTy to ssh into the MBLD again
  • If you do ‘mdadm -D /dev/md3’ now, it will say there is no such raid device (since you removed the 2 partitions /dev/sda4 and /dev/sdb4 that comprised the raid)
  • Run ‘parted /dev/sda’
  • Do ‘mkpart 4 4624MB 3T’ and ‘set 4 raid on’
  • When you do ‘p’ now you will see the 3TB size for the /dev/sda4 partition
    4      4624MB  3001GB  2996GB                  primary  raid
  • Repeat the last 3 steps, running ‘parted’ on /dev/sdb (instead of /dev/sda)
  • Both /dev/sda4 and /dev/sdb4 should now be correctly sized
  • Format /dev/sda4 using ‘mkfs.ext4 -b 65536 -m 0 /dev/sda4’
  • Repeat the last step for /dev/sdb4 (instead of /dev/sda4)

Recreating the raid array with the new partitions

  • Now create the raid array using ‘mdadm –create /dev/md3 –level=mirror –raid-devices=2 /dev/sda4 /dev/sdb4’
  • The above step creates a raid1 mirror setup, to create a raid0 stripe setup, change ‘–level=mirror’ to ‘–level=linear’
  • Format the raid array using ‘mkfs.ext4 -b 65536 -m 0 /dev/md3’
  • Once completed you should test that its ok by doing ‘mount -t ext4 /dev/md3 /DataVolume’
  • If the above mounts correctly, then you’re all set – reboot the MBLD and you should have a 3TB size visible with raid1 setup.

UPDATE:

Just like I said, there is an easier way (not 3 steps though) to do this and if you’re comfortable with UNIX and the command line (like I expect you to be before doing any of the above) and you have a Ubuntu box lying around, you can try out the quick and easy way here. I’m told it works, but I haven’t tried it out myself yet, so, try at your own risk!

August 4, 2012

NAS-ty WD


NAS-ty WD

So I finally got a NAS. I’d been reading up on quite a few of the lower end NAS units and reviews were generally good for WD’s My Book Live Duo. Built in DLNA server, SSH, RAID 0 or 1, good UI, access apps for iPhone and Adroid and to top it all off, it had options of 4TB or 6TB capacities with either 2x2TB or 2X3TB drives which could be swapped out. The swappability was what edged me towards this baby. I figured that I could buy the 4TB cheaper than the 6TB and when the price of the 3TB drives came down, I’d just get 2x3TB drives and swap out the 2X2TB drives and presto, as simple as that, higher capacity NAS.

NAS-ty WD

Well I was half right anyway. Yes, you could easily swap out the 2TBs for 3TBs, but no, it was nothing close to simple.

NAS-ty WD

First off, WD gets really territorial about the type of drives you put in there – its got to be WD drives and nothing else. You put in any other drive and it complains about incompatibility. Is there such a thing as an incompatible drive for a piece of equiptment this low end? Absolutely not. I poked around the filesystem and found whitelist XML that the system uses to filter off the drive parameters searching for the WD model prefix. If it doesn’t find it, it starts complaining and pushes the status LED to yellow, telling the user that troubles afoot. I couldn’t have that, so I edited the script, added in a line to allow a pair of Hitachis I had lying around.

<WhiteList> 
<Model description="Desktop Caviar">^WDC WD3[0-9].{7}M$</Model>
<Model description="Specific Enterprise RE" etype="constant">WDC WD30EZRX-00M</Model>
<Model description="Misc." etype="re">^WDC WD30EZRX-[0-9]{2}.*$</Model>
<Model description="ALL">^WDC WD.*$</Model>
<Model description="ALL">^Hitachi HDS5.*$</Model>
</WhiteList>

NAS-ty WD

That portion dealt with, I started pulling out the drives to see how the system rebuilt things. First was one drive, then the other, then I pulled both out and replaced them with new drives. Heres the issue. Apparently this NAS stores only a basic OS set in the firmware. When new drives are plugged in, the firmware will partition the drives into 4 parts:

  • 1x512MB swap partition
  • 2x2GB ext3 partitions
  • 1x2TB unformated partition

It then creates a RAID1 volume (/dev/md0) out of the 2x2gb partitions of both drives and starts copying the rest of the system files (boot/, bin/, usr/, etc) there and mounts it as /. From here everything else is setup including a second raid volume (/dev/md3) which will be your storage, either in RAID1 or RAID0 mode. This is where things get sticky. The system then formats the drives you put in up to 2TB only, no matter what the capacity of the drives. Of course I didn’t know that off hand so I ended up letting it format the drives and only after it finished did I realise it was only using 4 of my 6TBs. Back to the drawing board. I Googled for an entire night and found that no one was trying to swap out the 2x2TB for 2x3TB on this NAS! I mean, come on! Didn’t anyone else think of doing it?

With nothing to refer to, I started poking around the base system files and managed to piece together how the RAID volume is created and what was being used. This just happened to be mdadm. From the system scripts and the current partition information, I managed to reformate the disks to full capacity and get the RAID partition to the max, giving me my 3TB per disk. You’d think it would be smooth sailing from here right? Wrong. My formatted logical volume couldn’t be read by the system! Thankfully, this time someone did note a similar issue with one of WD’s other NAS devices and indicated a very unique block size requirement that was the issue. Formatting the partition using that block size, allowed the system to read the disk and after that it was a matter of using either mdadm or the UI to create the raid type I wanted.

Heres the weird thing – the firmware for the 4TB and 6TB NAS devices is exactly the same. There should be no reason why formatting the drives in the UI shouldn’t give me the maximum capacity for the drives. The system’s parted command config has this:

mkpart primary 4624M -1M

The -1M means to format from the given starting size (in this case 4624M) to the very last block, effectively giving the full capacity of the disk, but for some reason it doesn’t happen, hence the necessity to do things manually.

Took me over 2 days to get my 4TB up to 6TB but despite all the hassle, it was a good lesson. If anyone else wants the detailed steps of how I upgraded the WD My Book Live Duo from 4TB to 6TB, you can look here, but unless you have a whole load of time on your hands or you are really desperate to get your hands dirty and learn something, I suggest forking out a S$100.00 or so more and getting the 6TB direct.

UPDATE:

Some folks have been asking for the steps I took to upgrade the capacity to be placed on this site, what difference it makes where the instructions are, I have no idea. In anycase, I’ve put the details in the next post.