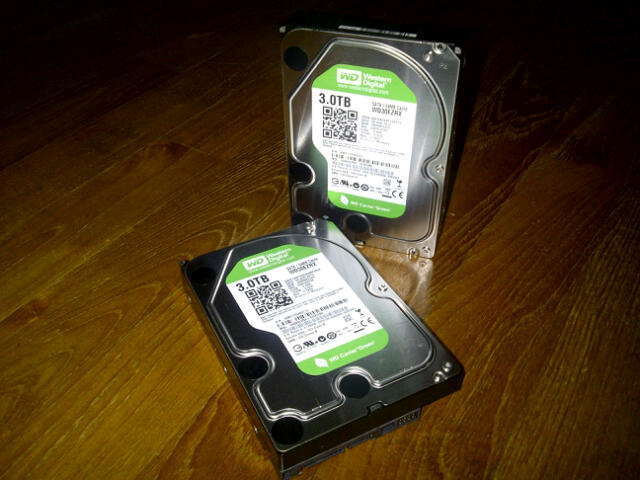
So I finally got a NAS. I’d been reading up on quite a few of the lower end NAS units and reviews were generally good for WD’s My Book Live Duo. Built in DLNA server, SSH, RAID 0 or 1, good UI, access apps for iPhone and Adroid and to top it all off, it had options of 4TB or 6TB capacities with either 2x2TB or 2X3TB drives which could be swapped out. The swappability was what edged me towards this baby. I figured that I could buy the 4TB cheaper than the 6TB and when the price of the 3TB drives came down, I’d just get 2x3TB drives and swap out the 2X2TB drives and presto, as simple as that, higher capacity NAS.
Well I was half right anyway. Yes, you could easily swap out the 2TBs for 3TBs, but no, it was nothing close to simple.
First off, WD gets really territorial about the type of drives you put in there – its got to be WD drives and nothing else. You put in any other drive and it complains about incompatibility. Is there such a thing as an incompatible drive for a piece of equiptment this low end? Absolutely not. I poked around the filesystem and found whitelist XML that the system uses to filter off the drive parameters searching for the WD model prefix. If it doesn’t find it, it starts complaining and pushes the status LED to yellow, telling the user that troubles afoot. I couldn’t have that, so I edited the script, added in a line to allow a pair of Hitachis I had lying around.
<WhiteList>
<Model description="Desktop Caviar">^WDC WD3[0-9].{7}M$</Model>
<Model description="Specific Enterprise RE" etype="constant">WDC WD30EZRX-00M</Model>
<Model description="Misc." etype="re">^WDC WD30EZRX-[0-9]{2}.*$</Model>
<Model description="ALL">^WDC WD.*$</Model>
<Model description="ALL">^Hitachi HDS5.*$</Model>
</WhiteList>
That portion dealt with, I started pulling out the drives to see how the system rebuilt things. First was one drive, then the other, then I pulled both out and replaced them with new drives. Heres the issue. Apparently this NAS stores only a basic OS set in the firmware. When new drives are plugged in, the firmware will partition the drives into 4 parts:
- 1x512MB swap partition
- 2x2GB ext3 partitions
- 1x2TB unformated partition
It then creates a RAID1 volume (/dev/md0) out of the 2x2gb partitions of both drives and starts copying the rest of the system files (boot/, bin/, usr/, etc) there and mounts it as /. From here everything else is setup including a second raid volume (/dev/md3) which will be your storage, either in RAID1 or RAID0 mode. This is where things get sticky. The system then formats the drives you put in up to 2TB only, no matter what the capacity of the drives. Of course I didn’t know that off hand so I ended up letting it format the drives and only after it finished did I realise it was only using 4 of my 6TBs. Back to the drawing board. I Googled for an entire night and found that no one was trying to swap out the 2x2TB for 2x3TB on this NAS! I mean, come on! Didn’t anyone else think of doing it?
With nothing to refer to, I started poking around the base system files and managed to piece together how the RAID volume is created and what was being used. This just happened to be mdadm. From the system scripts and the current partition information, I managed to reformate the disks to full capacity and get the RAID partition to the max, giving me my 3TB per disk. You’d think it would be smooth sailing from here right? Wrong. My formatted logical volume couldn’t be read by the system! Thankfully, this time someone did note a similar issue with one of WD’s other NAS devices and indicated a very unique block size requirement that was the issue. Formatting the partition using that block size, allowed the system to read the disk and after that it was a matter of using either mdadm or the UI to create the raid type I wanted.
Heres the weird thing – the firmware for the 4TB and 6TB NAS devices is exactly the same. There should be no reason why formatting the drives in the UI shouldn’t give me the maximum capacity for the drives. The system’s parted command config has this:
mkpart primary 4624M -1M
The -1M means to format from the given starting size (in this case 4624M) to the very last block, effectively giving the full capacity of the disk, but for some reason it doesn’t happen, hence the necessity to do things manually.
Took me over 2 days to get my 4TB up to 6TB but despite all the hassle, it was a good lesson. If anyone else wants the detailed steps of how I upgraded the WD My Book Live Duo from 4TB to 6TB, you can look here, but unless you have a whole load of time on your hands or you are really desperate to get your hands dirty and learn something, I suggest forking out a S$100.00 or so more and getting the 6TB direct.
UPDATE:
Some folks have been asking for the steps I took to upgrade the capacity to be placed on this site, what difference it makes where the instructions are, I have no idea. In anycase, I’ve put the details in the next post.
Comments (0)


